How to Edit Videos for Beginners in the video makker
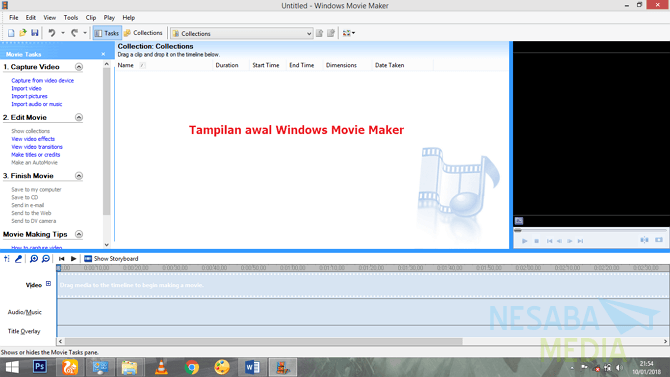
1.First of course you open and run Windows Movie Maker. Below this is the initial appearance of Windows Movie Maker on the portable version we use. There is a slight difference, but in terms of the quality of how it works, certainly not inferior to the installed version.
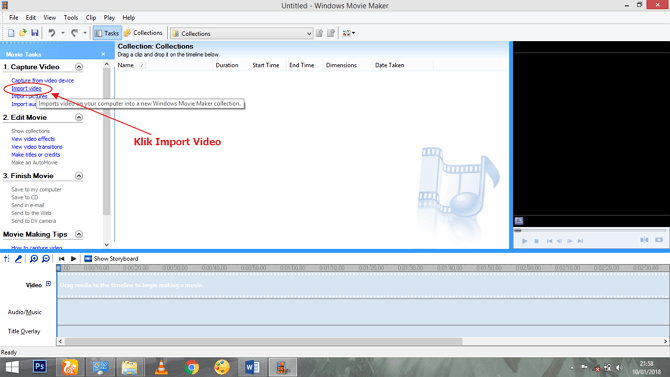
2. Because using existing videos, you only need to enter or commonly called the Import video to be edited to the Windows Movie Maker work screen. Wait for a moment.
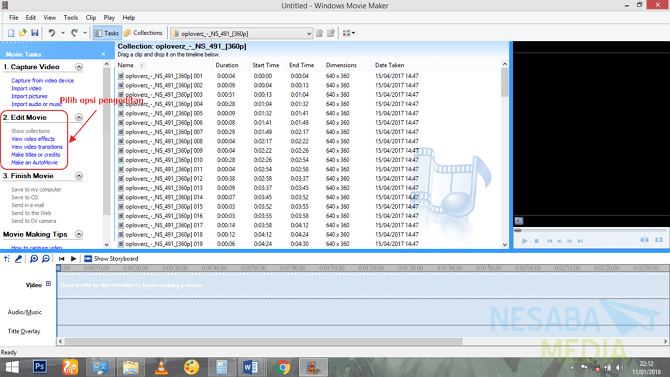
3.After the Import video process is complete you can see it on the work screen. Usually the video display is the same as in general, but the version that we use is divided into several sections according to the duration and size.
4. You can see the Edit Movie menu located right on the right side of the display and under the Capture Video menu. In the Edit Movie menu, you can see various video editing options.
5. But you should know that editing is done in the Timeline, not on the Windows Movie Maker work screen. Therefore, before dragging part or all of the Video in the Colections towards the Timeline, wait a few moments.
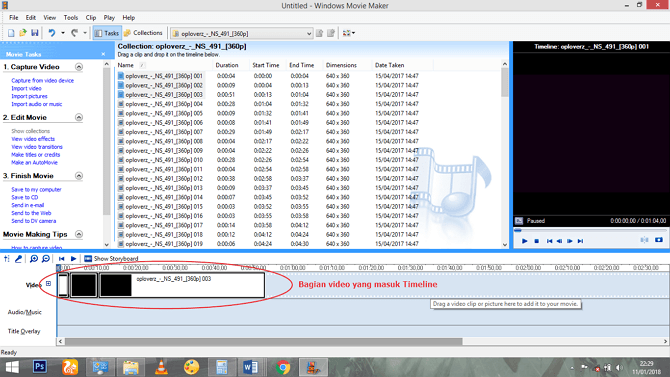
6. The first is to add text to the video. Once placed in the Timeline you can see the video split into sections according to the provisions of Windows Movie Maker. This aims to facilitate editing which is done only on certain parts.
7. Select one or several parts of the video where you want to enter text or you can also click on the timeframe in the Timeline then select Make Titles or Credits.
Select one or several parts of the video where you want to enter text or you can also click on the timeframe in the Timeline then select Make Titles or Credits.
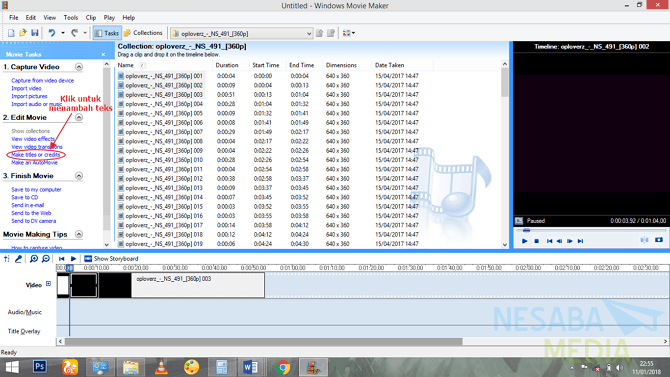
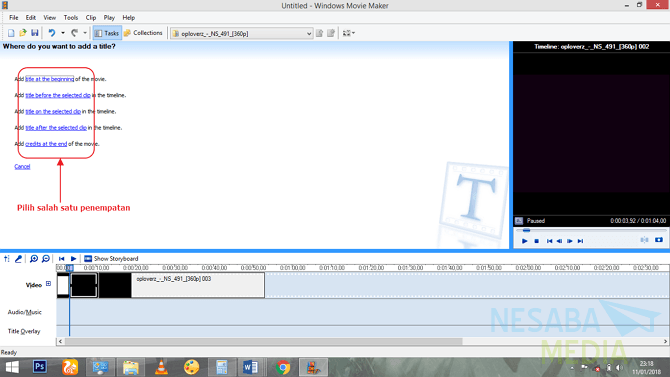
8.After clicking, several options will appear to determine the placement of the text or titles. You can choose as you wish :
- title at the beginning: text at the beginning of the video
- title before the selected clip: text before the clip
- title on the selected clip: text on the selected clip
- title after the selected clip: text after clip
- credits at the end: text at the end of the video
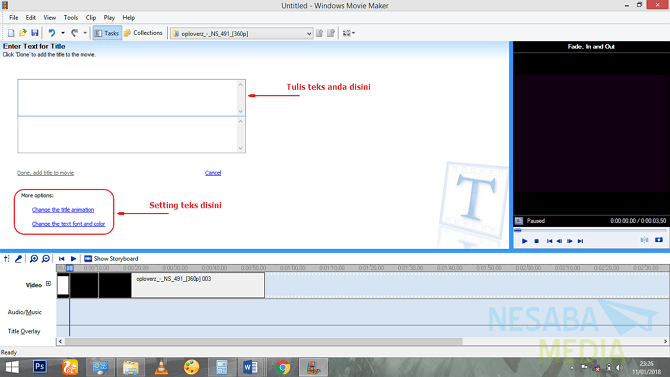
9. After that, write the text as you wish and set the size, color and others by clicking on the menu in More Options. Once deemed appropriate click Done, add title to movie.
10. The second is to add effects to the video. Similarly, in adding text you can select certain parts of the Timeline then click View Video Effects.
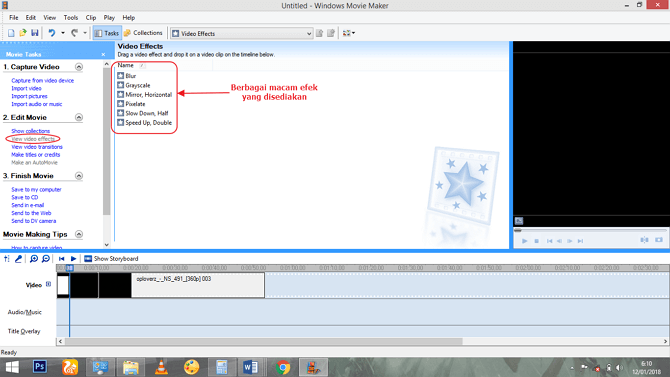
11.After that you will be presented choices of the effects you have in Windows Movie Maker. You can choose one or several as desired. But here the placement of effects is not the same as in the previous text. Drag one effect to the part of the video in the Timeline.
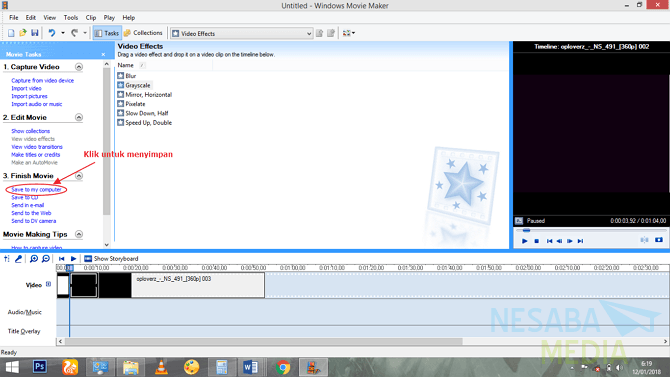
12. Don't forget when finished click Publish or Save to My Computer to save your edited video file.
Click on the link bellow
https://youtu.be/Cm_l-VE8X6o
1.First of course you open and run Windows Movie Maker. Below this is the initial appearance of Windows Movie Maker on the portable version we use. There is a slight difference, but in terms of the quality of how it works, certainly not inferior to the installed version.

2. Because using existing videos, you only need to enter or commonly called the Import video to be edited to the Windows Movie Maker work screen. Wait for a moment.

3.After the Import video process is complete you can see it on the work screen. Usually the video display is the same as in general, but the version that we use is divided into several sections according to the duration and size.
4. You can see the Edit Movie menu located right on the right side of the display and under the Capture Video menu. In the Edit Movie menu, you can see various video editing options.

5. But you should know that editing is done in the Timeline, not on the Windows Movie Maker work screen. Therefore, before dragging part or all of the Video in the Colections towards the Timeline, wait a few moments.

6. The first is to add text to the video. Once placed in the Timeline you can see the video split into sections according to the provisions of Windows Movie Maker. This aims to facilitate editing which is done only on certain parts.
7. Select one or several parts of the video where you want to enter text or you can also click on the timeframe in the Timeline then select Make Titles or Credits.
Select one or several parts of the video where you want to enter text or you can also click on the timeframe in the Timeline then select Make Titles or Credits.

8.After clicking, several options will appear to determine the placement of the text or titles. You can choose as you wish :
- title at the beginning: text at the beginning of the video
- title before the selected clip: text before the clip
- title on the selected clip: text on the selected clip
- title after the selected clip: text after clip
- credits at the end: text at the end of the video

9. After that, write the text as you wish and set the size, color and others by clicking on the menu in More Options. Once deemed appropriate click Done, add title to movie.

10. The second is to add effects to the video. Similarly, in adding text you can select certain parts of the Timeline then click View Video Effects.

11.After that you will be presented choices of the effects you have in Windows Movie Maker. You can choose one or several as desired. But here the placement of effects is not the same as in the previous text. Drag one effect to the part of the video in the Timeline.
12. Don't forget when finished click Publish or Save to My Computer to save your edited video file.
Click on the link bellow
https://youtu.be/Cm_l-VE8X6o


Comments
Post a Comment